


Updated: March 12, 2024
You can use Flodesk with Showit to embed a form from Flodesk onto Showit in order to deliver freebies and grow your email list. I’m going to take you step by step on how to use Flodesk with Showit by embedding a Flodesk form on your Showit website. If you don’t have Flodesk yet, use my affiliate link to get 25% off your first year!
Watch a step by step tutorial on how to embed a Flodesk form on your Showit website here:
Determine how you want to deliver your freebie
There are a few different options on how to deliver your freebie once someone signs up on your website.
- The freebie will pop-up in a browser window to be saved
- Finish the freebie delivery via email
Either way, you can use the Showit media library to get a link to send to your customers.
TIP: Make sure when you bring your freebie into Showit you are naming it a friendly name. You don’t want your document name to be rheaitehrt2342343.pdf for example 😉
Upload the document into your Media Library, and then hover over the corner until you see the link icon and click it. This will be copying a link for you to use to deliver it to your visitor!

How To Use Flodesk To Create An Inline Form
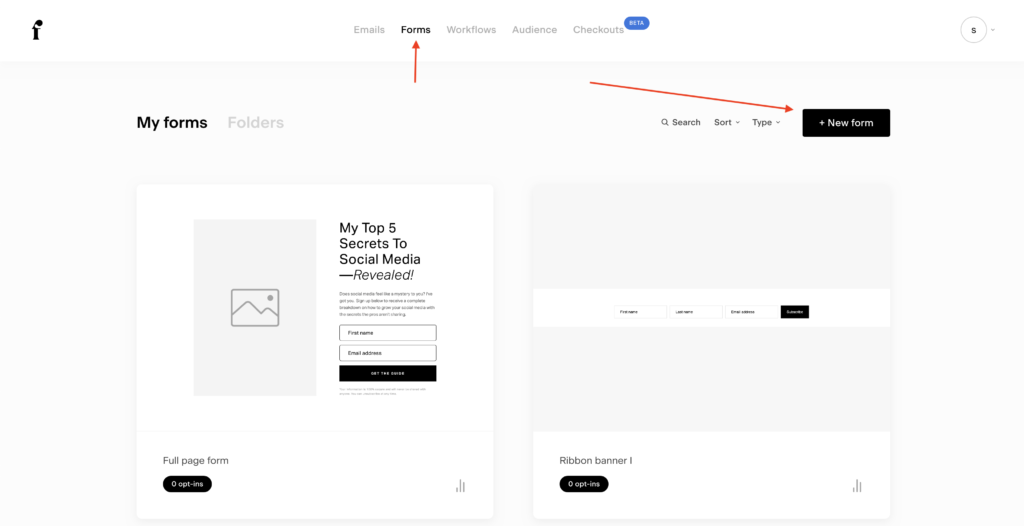
When you log into Flodesk you will have some options to use templates. You want to click the Flodesk icon in the top right corner to start.
- Then go to Forms at the top, and then New Form
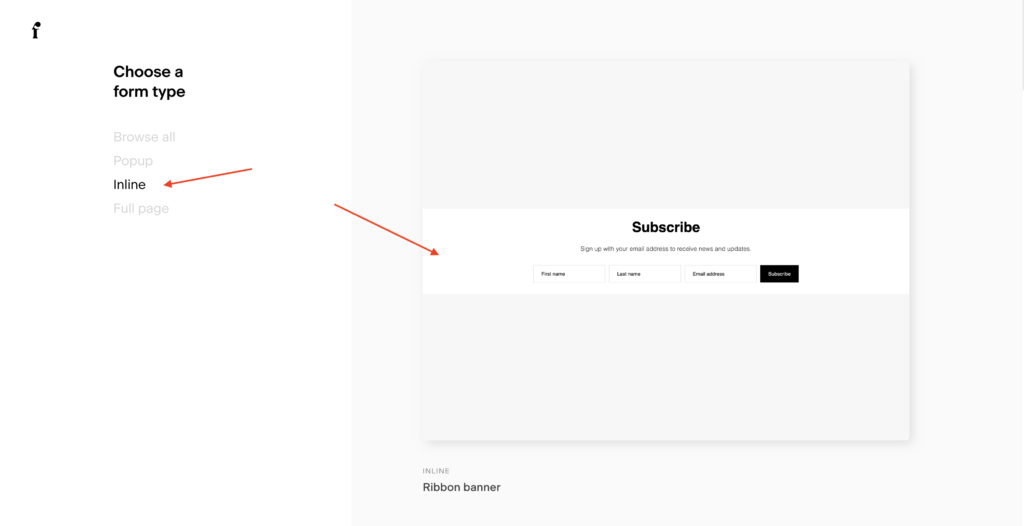
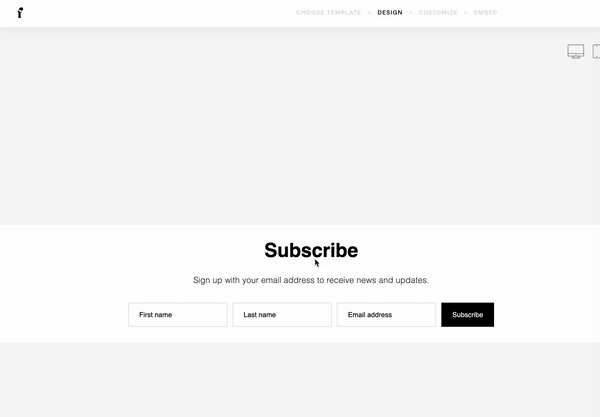
- Now you want to select the Inline Form, and then choose the very first template that shows called Ribbon Banner. A basic, stripped down form is what you want since all of the design elements can be created in Showit!
You are now going to design your form!
Design Your Opt-In Form in Flodesk
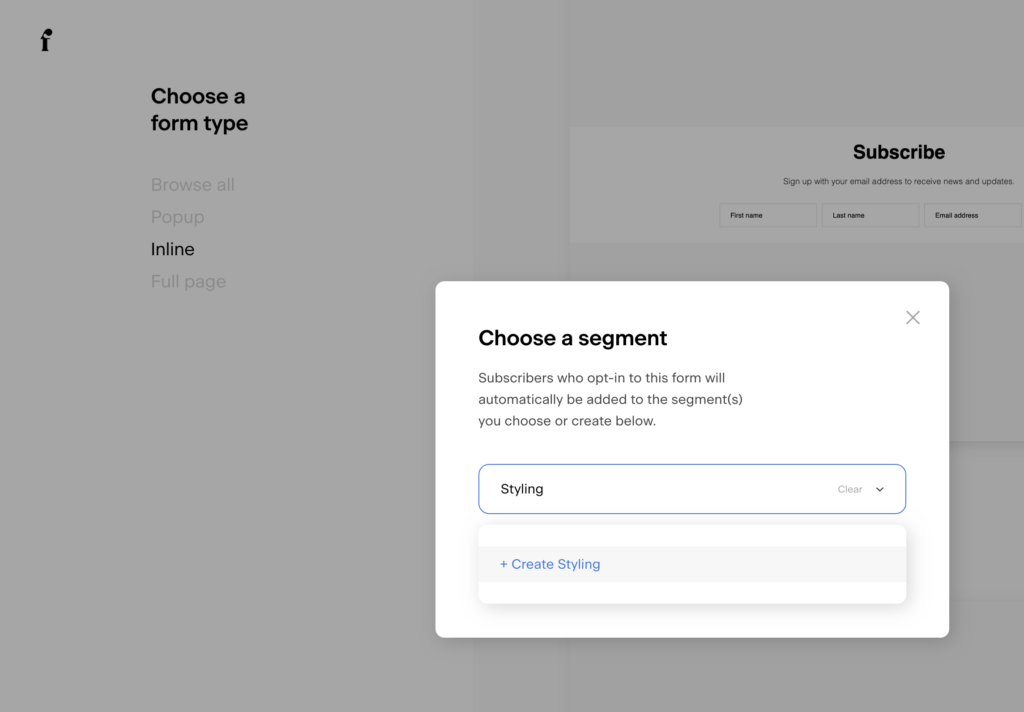
Choose the segment
The very first step is going to be selecting your segment. Think of the segment as a way you are going to target emails in the future. In this example, if someone is signing up for a freebie that teaches people how to style their hair, you want to set the segment to “Styling”. This way, you can target all emails that relate to how to style your hair to the people that signed up under this freebie.
Strip Down the Form
We want to completely remove all of the text around this form. Again, this is because when you embed your Flodesk form onto your Showit site, you want Showit to be the design and Flodesk to be the form only.
- Click the text in Subscribe and the text below, and delete
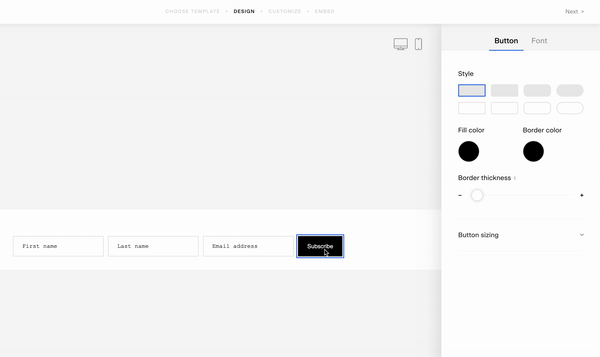
Format the Flodesk Form Fonts and Colors
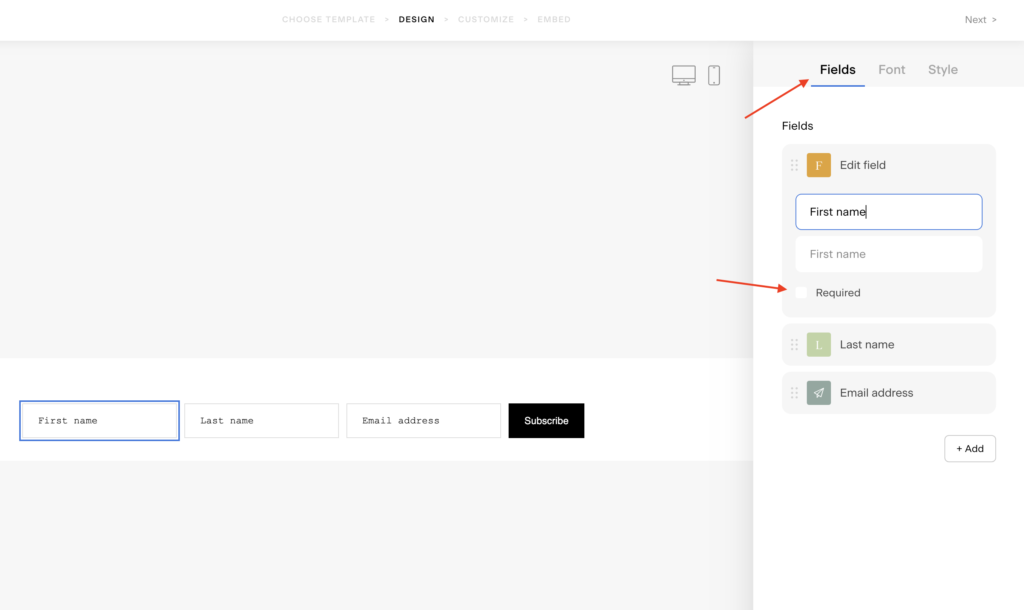
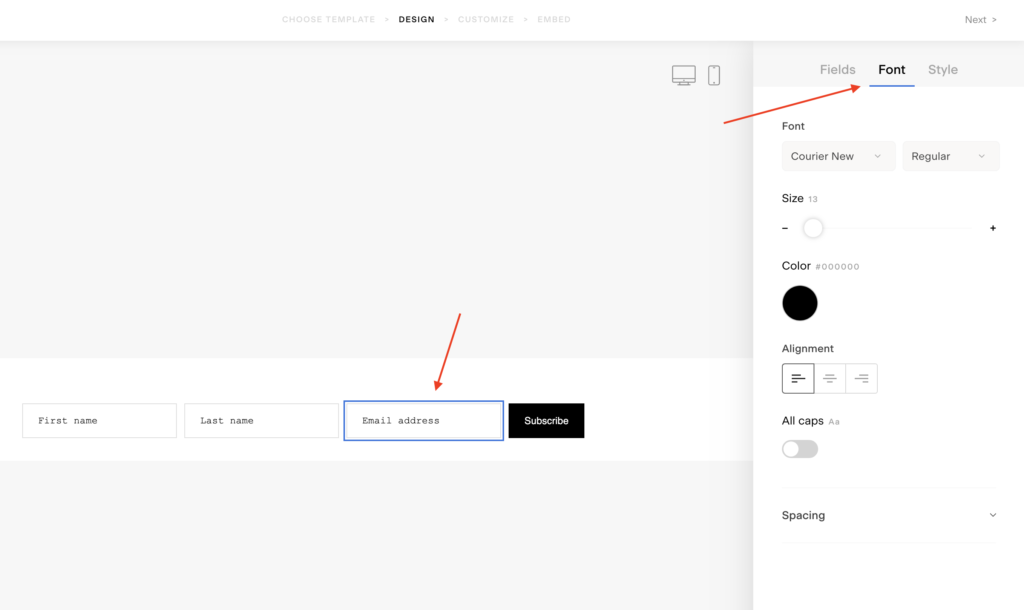
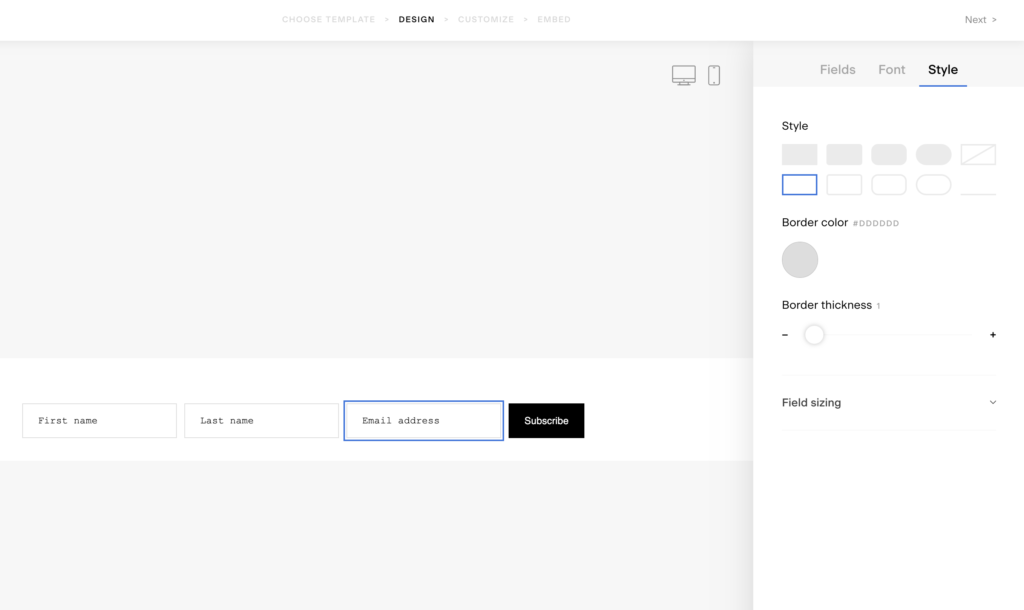
The next step is formatting the form to match your brand as far as fonts and colors. If you click in one of the input boxes, you will see options on the right to customize these fields.
THE FIELDS TAB
This is where you can indicate which fields are required.
THE FONT TAB
Update the font and the colors of the text in the input fields.
THE STYLE TAB
Where you can customize the input boxes themselves (shape, borders, etc.)
Now you want to click the Subscribe box to bring up different options relating specifically to this box.
A Very Important Step – Making the Form Transparent
This is a very important step in how you use Flodesk with Showit. You want to click anywhere in the form (not in an input box or submit box), and go to the Form Settings on the right. Make sure the Canvas Color AND Background Color are Transparent by choosing the white box with the red diagonal line across it.
At the top of the page, you can click Thank You to update the thank you message. This is the message visitors will see after they click Submit on your form. You can choose a message that is already created, or click Custom to write your own message. Click the font tab on the right to update the font settings for the message.
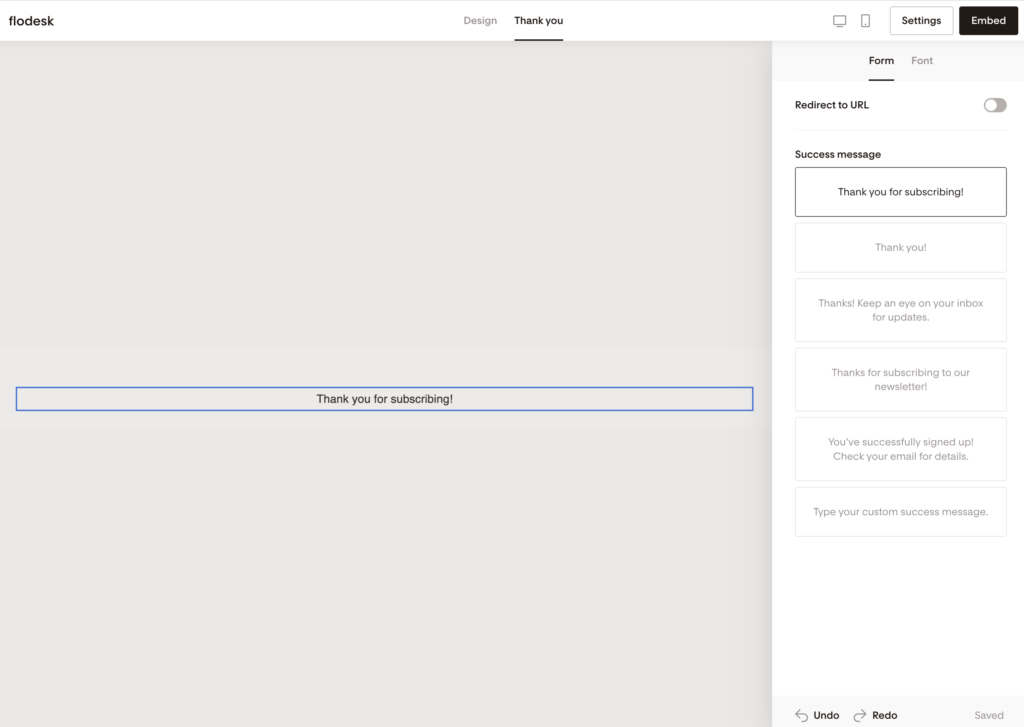
Also, at the very top of this screen you can see the switch to ‘Redirect to URL’. If you do not want a message to show and you are automatically opening a new webpage, you can put the URL in here. If you leave this switched off, the message will show once the form is submitted.
How to Use Your Flodesk Form in Showit
You will have two codes – a header code and inline code. You are going to copy both of these codes. Lets jump back into Showit for the next steps!
When you’re in Showit, go to the bottom of the page and hover over square icon and select Embed. Double click in the Embed box to bring up the Edit Code box.
- Go to Flodesk and copy your header code, then come back to Showit and paste this code into the box
- Go back to Flodesk and copy your inline code, then come back to Showit and paste it after the first code

When you embed a form into Showit, you want to make sure you Preview it and not just rely on the Showit Editor to see what it looks like. Sometimes the form looks completely different ‘live’, and…don’t forget mobile! When you add the embed box it will be just dropped anywhere, so be sure to resize it and fix it there too.
Need a new Showit page for the form? Here’s some FREE ones!
I created three landing pages that you can bring into your existing Showit website, customize and drop your new Flodesk inline form into!
Test Your Embedded Form LIVE!
Be sure to fill out the form on your site and make sure everything comes through how you like it. This is your chance to really WOW someone that could pay for your services later, so impress them!
Also, be sure to set up automations in Flodesk as well. Everyone that submits their information through your Flodesk form will be going to a segment, so now is your chance to set up workflows to send email sequences, etc.
Does this sound like a lot of work? I get it! If you need a pro to just get it done for you, check out my Showit Design Assistance service. I can also help you if you make a comment or email me directly!
Pst – if you don’t have Showit yet, use my referral link and you will get a FREE MONTH of Showit! Don’t forget my coupon code for Flodesk too – you can get 25% off your first year!


