


A canvas view in Showit allows you to provide an interactive part in your website. Some of the ways I’ve used canvas views include testimonials, laying out a process, and on contact forms. Canvas views can either change automatically, or by clicking an icon.
Showit Video Tutorial: How To Create a Testimonial Slider
The below video will take you step by step on creating a testimonial slider in Showit.
Showit Canvas Views Step by Step
Not much of a video person? These step by step instructions should help you on how to create a Testimonial Slider in Showit:
Step One: Create a Blank Canvas
Next to the page name you are on, click the dots and then click ‘Add Blank Canvas’. The canvas will go to the bottom of the canvas list, so be sure to drag it up to the spot you want it to be! Then click the dots next to it and rename it appropriately.
Step Two: Design The Look of the Testimonial Slider
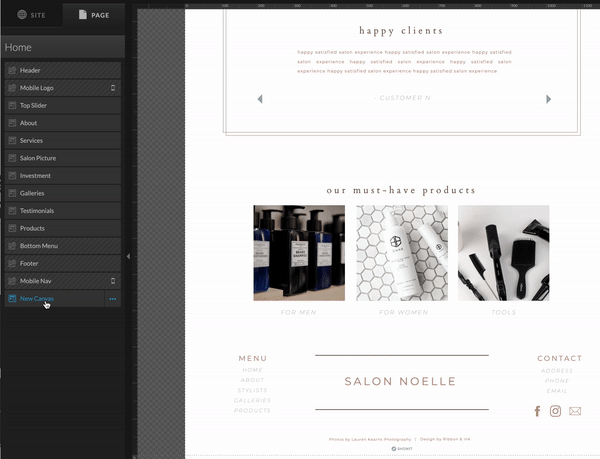
Design how you want the canvas to look by adding any text, graphics, etc. that you want. You also want to be sure and add icons that will let the user click through the the different canvas views.
- Hover over the bottom square, and then click Icon.
- It will default to a smiley face, so go over to the right hand side under Icon Chooser and pick your favorite one
- Choose the color of the icon by going to Icon Settings (don’t forget to update the color on both desktop and mobile)
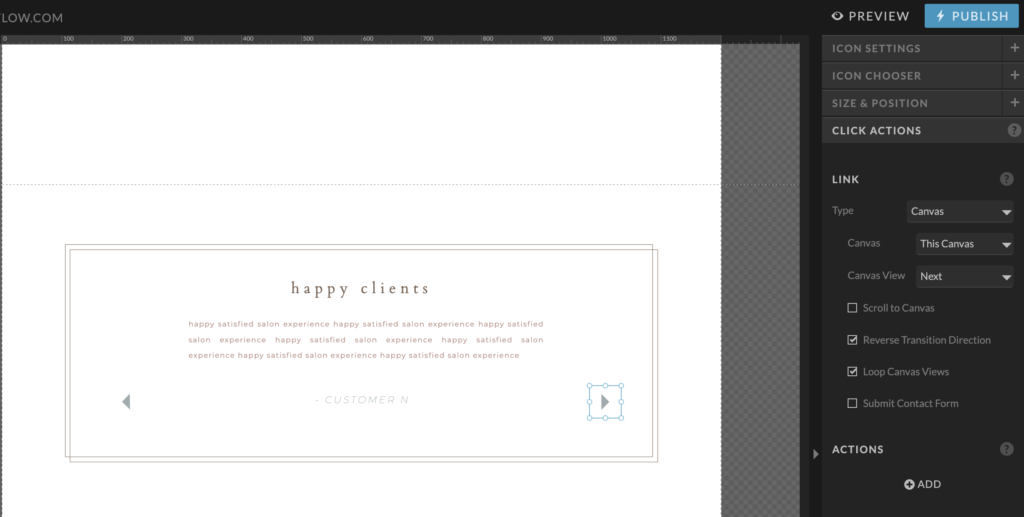
- Set the Click Actions so they click through the canvas views (Click Actions – Canvas – This Canvas – and then either Next or Previous, depending on which arrow you are setting the click action for).
Step Three: Design the Mobile View
This is SUCH an important step and will save you SO much time. After you design the desktop view, make sure you design the mobile view exactly how you want it. Keep in mind, you can’t change the canvas size between different canvas views, so make sure it is big enough to fit all of the content you will be putting in.
Step Four: Make Sure Elements are Where They’re Suppose To Be
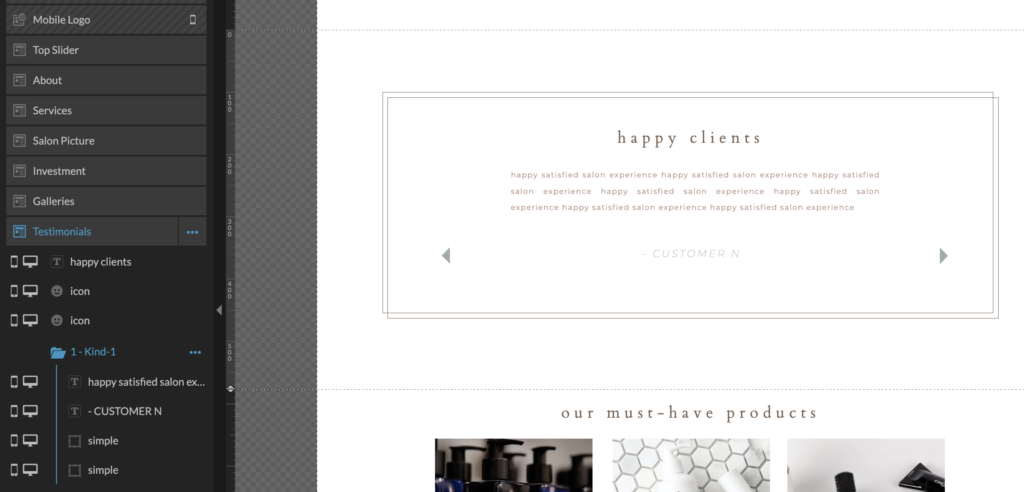
Make sure all of the canvas elements are in order from how it views on the screen from top to bottom. This is how Google ‘reads’ your website, so setting it up from the beginning before the last step is a good idea!
Also, make sure any ‘non-changing’ elements are outside of the canvas view. In the example below, I have the icons and the ‘happy clients‘ text on the outside of the canvas view since those aren’t moving and won’t be changed. I want those to be in the same place every time someone clicks through the different canvas views.
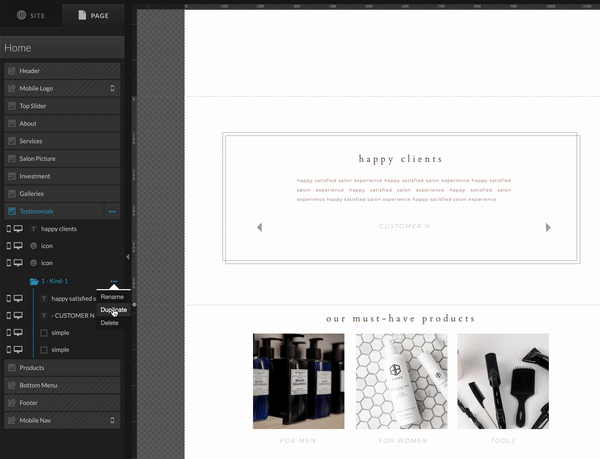
Step Five: Copy the Canvas View
Once everything is set up exactly how you want it, you can copy the canvas view as many times as you need it! If you need three testimonials, copy it three times.
A few notes about Canvas Views in Showit
- The size of the canvas cannot change from view to view. For example, if you have a really long testimonial keep that in mind when you are building your first canvas view.
- If you want the canvas views to automatically rotate when someone is on the page, go to View Transitions and click off Auto Advance View. You can change the timing and the way the canvas views in and out in this area as well.
- If you are clicking to the next canvas and it jumps the page up, uncheck Scroll to Canvas under the Click Actions on the icon arrows.
- Don’t put any important information in a canvas view for SEO purposes. Keep those ‘words’ on the main page and tagged with the appropriate text settings.
Would you rather just have a pro do it?
Check out my Showit Design Assistance service! I have set up lots of canvas views for entrepreneurs looking to change the layout of their testimonials, or even outline their processes in a more streamlined way.


