When you embed your Convertkit form into Showit, it is a natural way to deliver freebies and gain new email subscribers. Once you figure out what you are trying to accomplish, the steps to embed the code from Convertkit into Showit is very simple.
If you would rather watch the how-to, view it on YouTube!
The first step is uploading your freebie to Showit
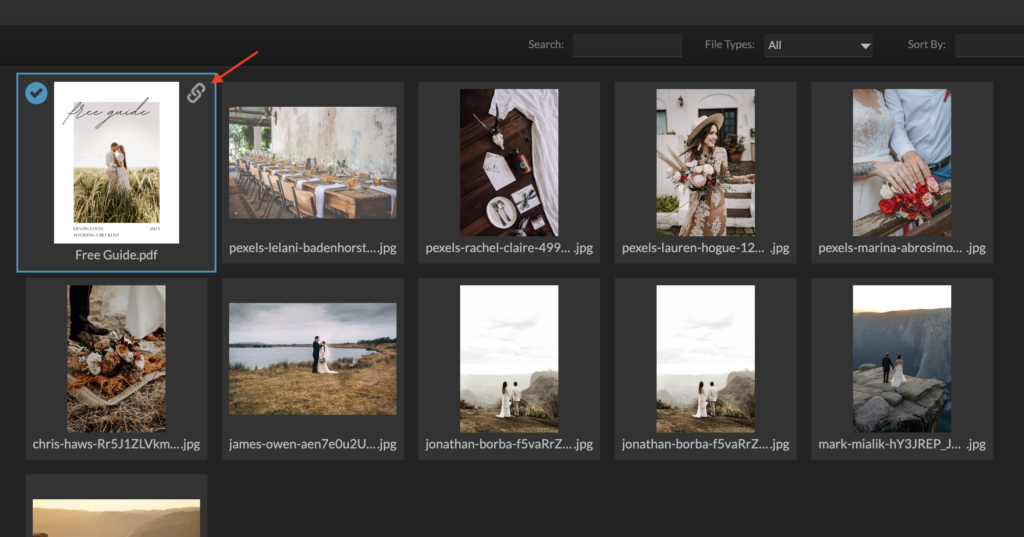
If you are delivering your freebie as a document (PDF, jpg, etc.) you can upload it to your Media Library in Showit. Make sure when you bring your freebie into Showit you are naming it a friendly name. You don’t want your document name to be rheaitehrt2342343.pdf for example 😉
Once the document is in your Media Library, hover over the corner until you see the link icon and click it. This will be copying a link for you to use to deliver it to your visitor!
Now you want to figure out how you want to deliver your freebie from your Convertkit form
There are a few ways to connect and deliver your freebies to your visitors through your website.
Option 1: They can enter their email on your website and immediately have the freebie pop-up in a window.
Option 2: Enter their email on your website, and finish the freebie delivering via their email through Convertkit
I’ll take you through both methods depending on what you want to do!
Let’s create the canvas on your Showit site
The first step is to create the area where you want them to enter their email address. This can either be through a pop-up, a landing page, or within a canvas on one of your Showit pages. In this tutorial, I’ll go with a canvas within a page to make things simple!
Step One: Create Your Opt-In Canvas
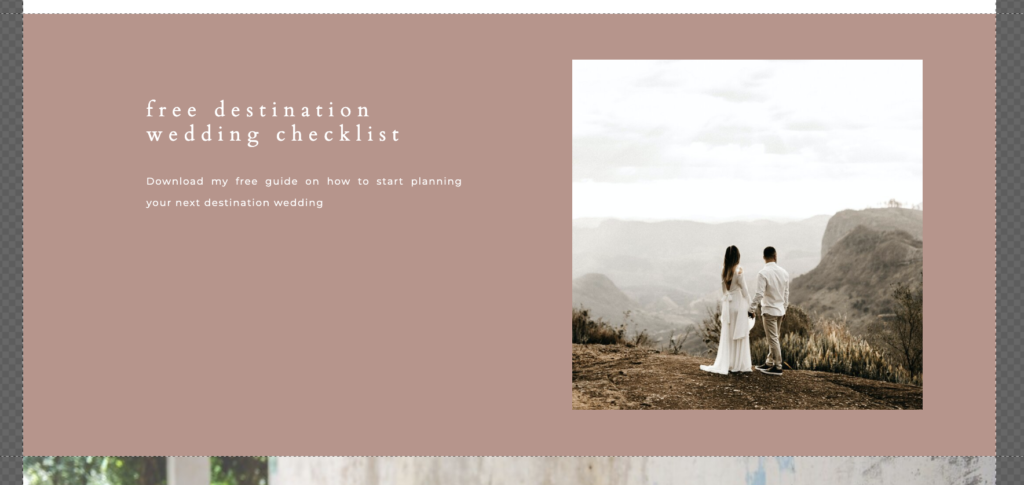
There are a million ways to design a canvas on your Showit website, but there are a few main things you want to include: an image, a heading, and a small paragraph explaining why your visitor needs this freebie. Once you create your canvas, turn it into a site canvas so you can use it on multiple pages of your site!
Tip: if you want someone to subscribe to a newsletter, you should give them something that will really impact them. Simply saying ‘subscribe to my newsletter’ doesn’t sound too appealing, does it?
Want some free pages to start with?
If you use Showit as your website platform, go grab these three FREE landing pages I’ve created for you!
Step Two: Create Your Form in Convertkit
The steps in Convertkit will take you the longest, but once you have one set-up it will be easy to duplicate for any other opt-ins you have!
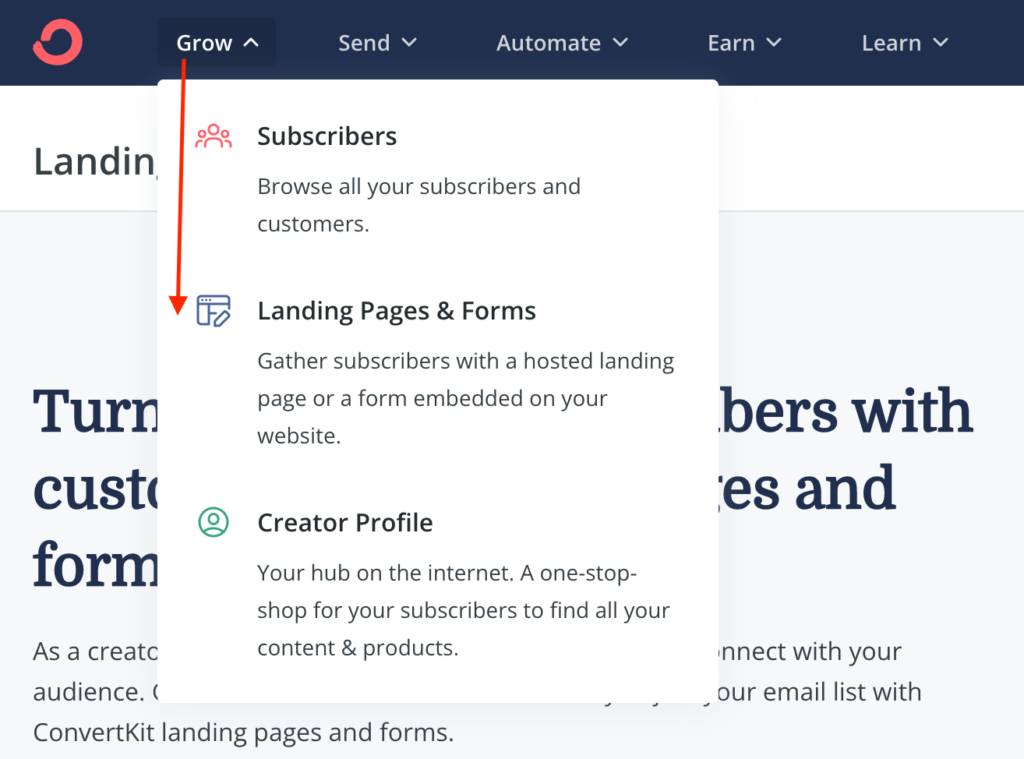
- At the top of your window go to Grow then select Landing Pages & Forms
- Then under “How do you want to gather subscribers“, select Form
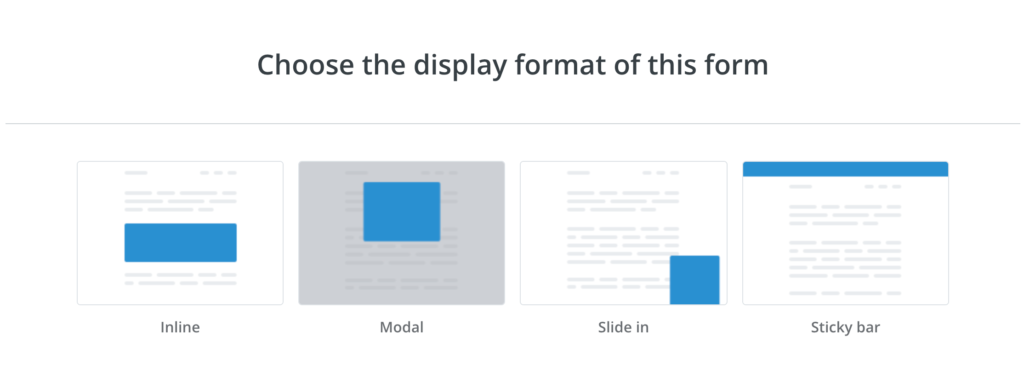
- When the options show up, select Inline
- Now you select your template – you want to choose Clare. This is because you want the most stripped down version of the form since Showit provides all the ‘pretty’ details.
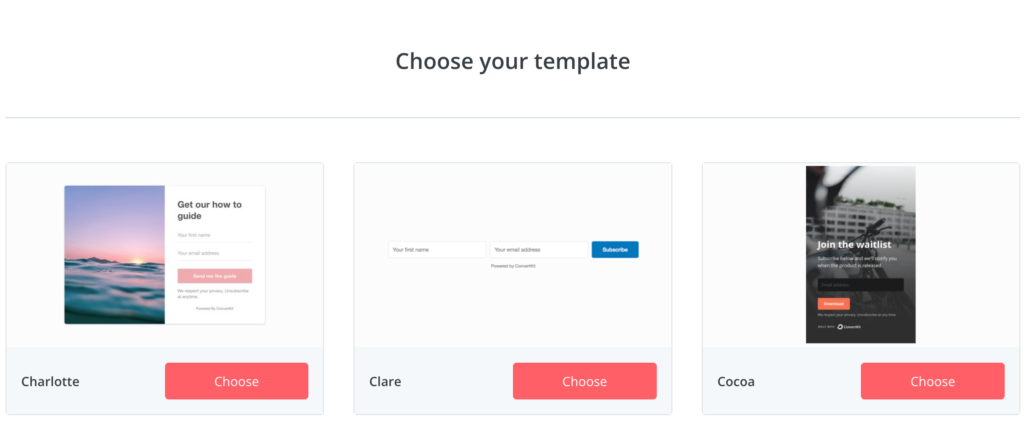
You are now going to design your form!
Step Three: Design Your Opt-In Form in Convertkit
Update the Form Name
You want to change the name of the form first to something that indicates what it is for – some name examples could be:
- Website Email Opt-In
- “Name of Freebie” Freebie Opt-In
- Click the pencil next to the word Clare to update the name
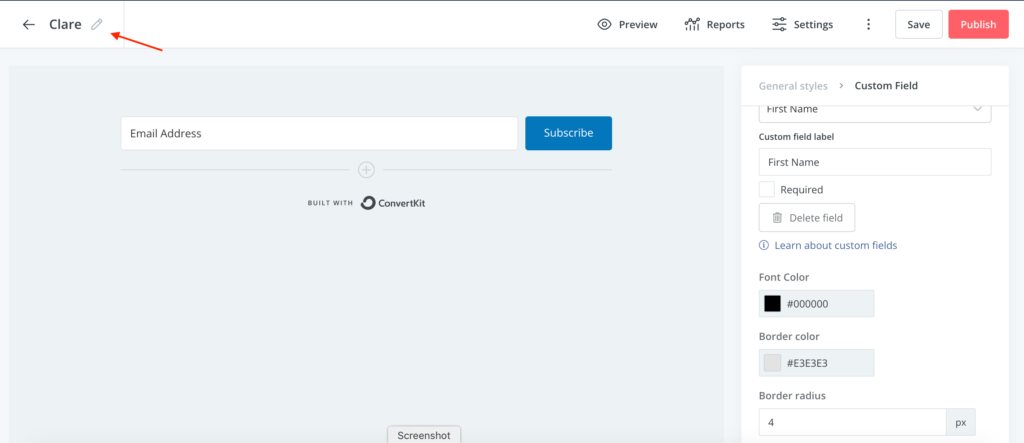
Add a First Name Field
Next step is to add any fields you want – don’t go too crazy here though. I would highly recommend adding a first name field, because that will allow you to personalize your emails in the future!
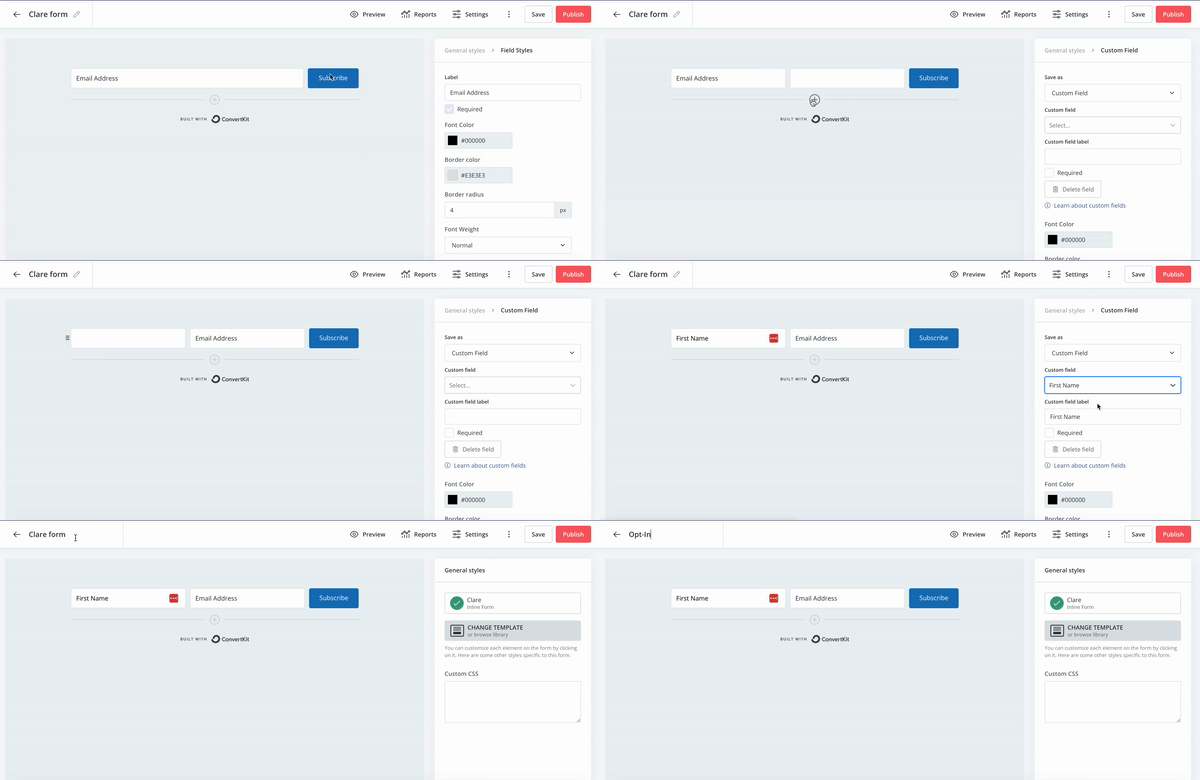
- Click the plus sign in the circle under the Email Address field
- This will add the new field to the right of the field (which isn’t ideal). If you hover in between the fields you will see a few lines and your mouse will turn to a little hand. Click, hold and drag the first name box to the left of the email field.
- Click in the box and type in ‘First Name’
- On the left, under Custom Field Label, make sure it is assigned to First Name
- If you want to change the word ‘Subscribe‘ you can click on the text and update it to whatever you want! (for example: Download Now, I Need This, Grab The Guide)
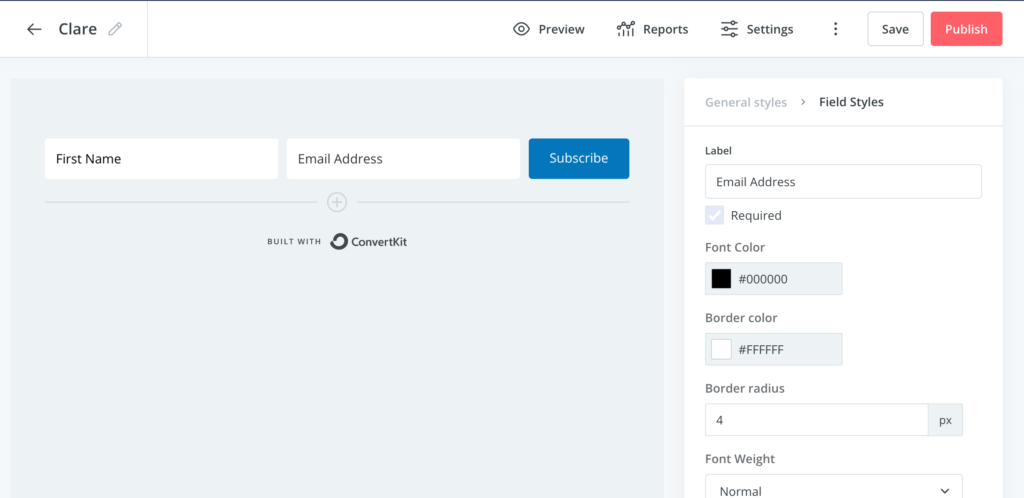
Format the Convertkit Form Fonts and Colors
Now we want to format the text and colors to match as closely to your brand as possible. Click in the Email Box to see the options to update font color and border color of the input boxes. Click in the Subscribe button to format options specific to this button too.
Important Note: the only way to update the font in your Convertkit inline forms is to use CSS.
Review the Convertkit Settings Next
At the top right you will see Settings – this is where you decide what happens when someone fills out the form and clicks Subscribe. This is where we start thinking about your original plan…
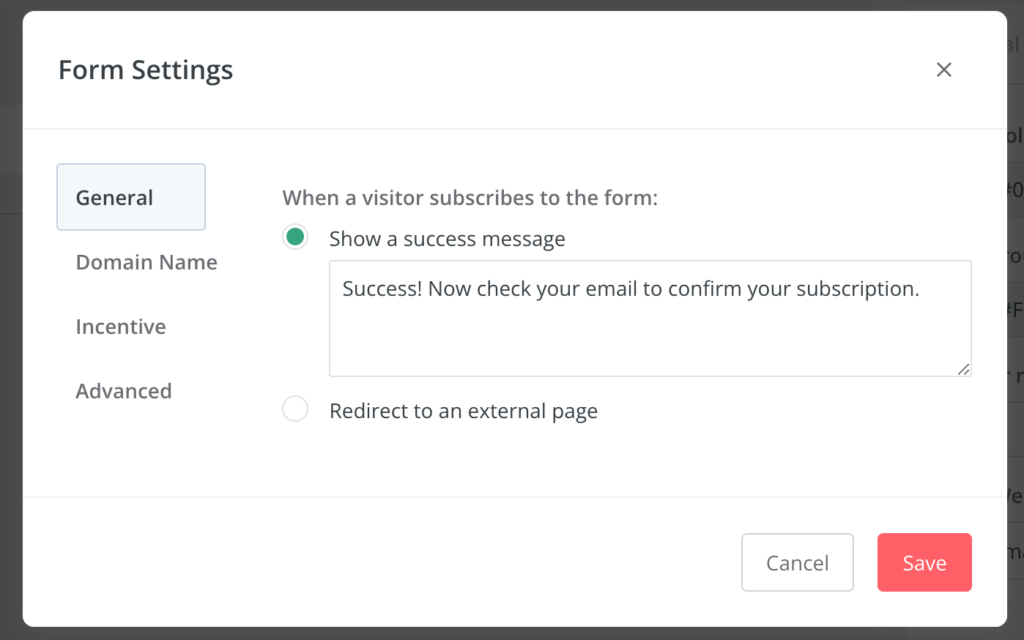
Option 1: They can enter their email on your website and immediately have the freebie pop-up in a window.
- For this option, select the Redirect to an external page (remember waaayyyy back when you copied your freebie link from the Media Gallery in Showit? This is where it goes!)
- Keep in mind, they will still receive an email to confirmation their subscription into your email list
Option 2: Enter their email on your website, and finish the freebie delivering via their email through Convertkit
- For this option, select the “Show a success message” – and you can update this text as well!
Next we want to look at “Incentive”
This section is unique to this form – so you can change it depending on what freebie or form you are creating. Select the ‘Edit Email Contents’ to design the email you want your visitor to receive.
- If you are wanting the freebie to pop-up as soon as they enter name and email, you want to design the email as a general ‘welcome and confirm’ to your email list.
- If you are wanting the freebie to be delivered via email, you would deliver it this way by using the ‘After confirming redirect to: section. This is where you can enter the link to the freebie from the Media Gallery or you can actually put the document right in here by selecting ‘Download’ and uploading it!
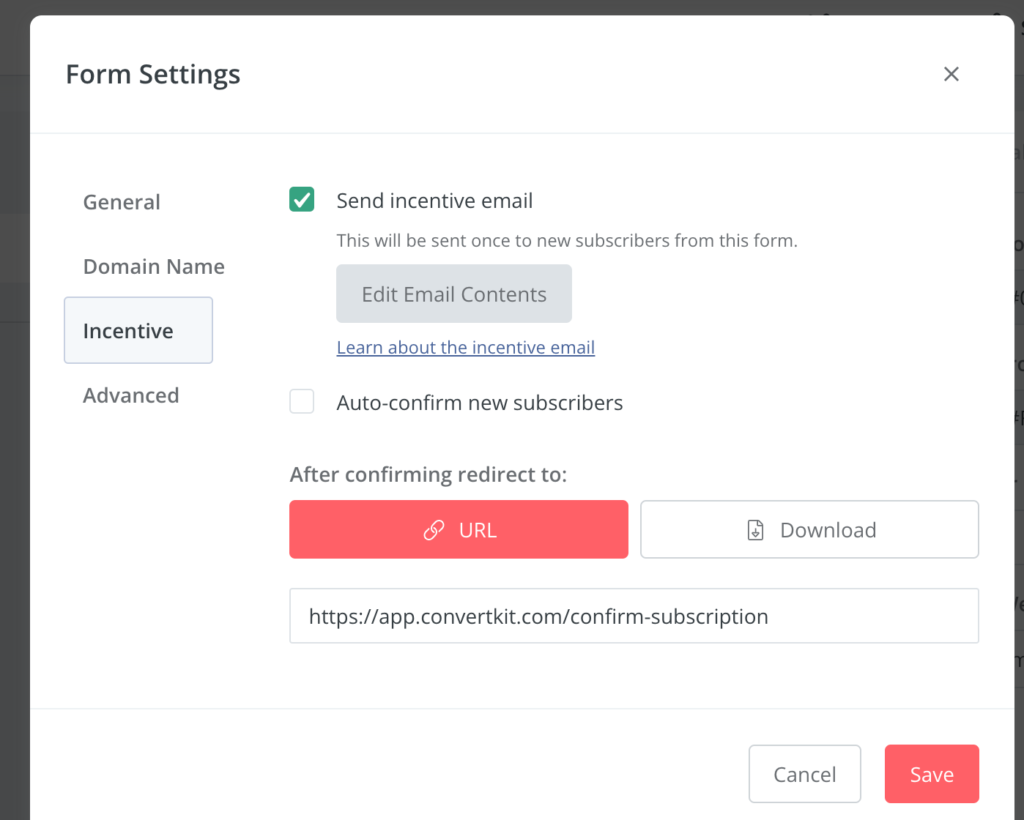
The other options (Advanced and Domain Name), are somewhat self-explanatory so I will skip those for this tutorial!
Now you are ready to embed your Convertkit form into Showit…
Step Four: Embed Your Convertkit Form into Showit
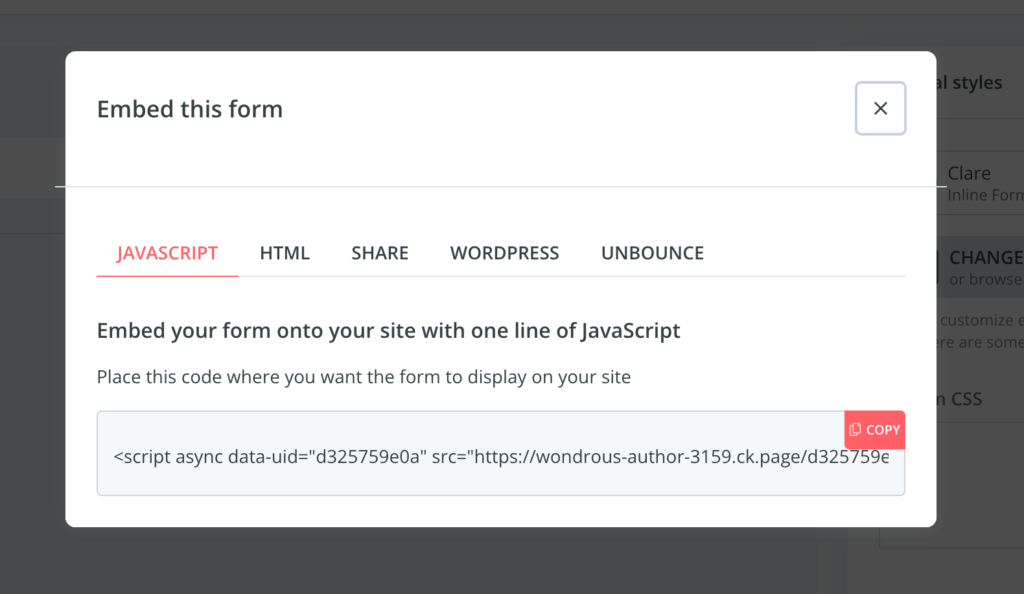
Once everything is all set up in Convertkit, just hit Publish in the top right hand corner! A box will pop-up where you can copy the code for the form. Click the little red copy button in the corner, and then go back to Showit!
When you’re in Showit, go to the bottom of the page and hover over square icon and select Embed. Copy your code in the box and click save!
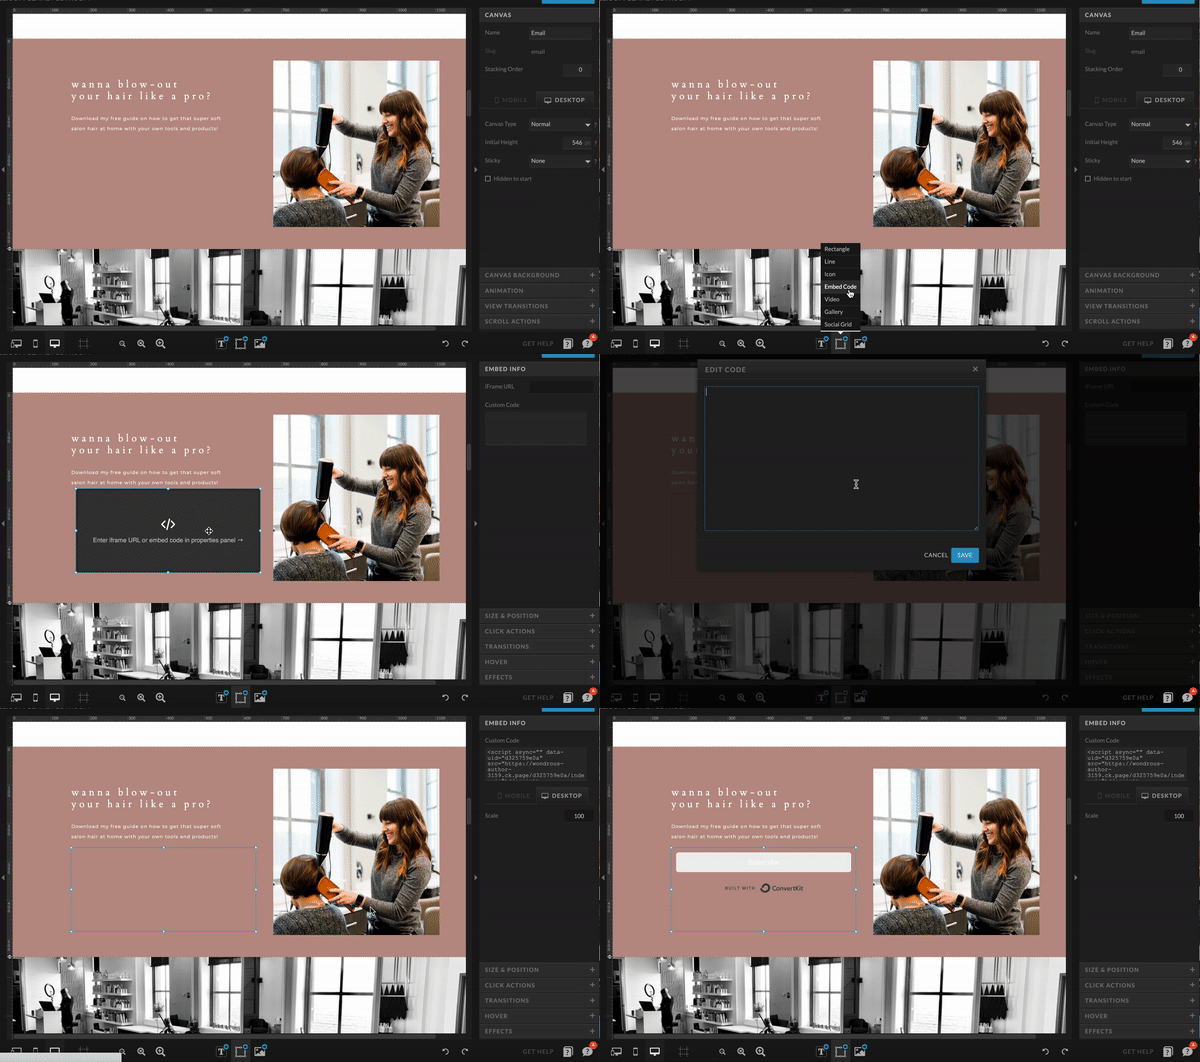
Now, don’t set it and forget it! Make sure you Preview it in Showit. You want to make sure the form looks great in preview – especially for Desktop. Sometimes the form looks completely different ‘live’ compared to the Showit editor. And…don’t forget mobile! When you add the embed box it will be just dropped anywhere, so be sure to resize it and fix it there too.
Step Five (The Last Step): Test It!
Make sure you fill out the form yourself and everything is coming to you how you like. It is SO important to do this step so you can see what your visitors are getting. This is your chance to really WOW someone that could pay for your services later, so impress them!
Also, if you are not on the free version of Convertkit, you have the ability to set up some automations. So be sure to set those up! You can tag people when they come through a certain form, set up automatic welcome emails, etc. The opportunities are endless!
Sound like a lot of work? I get it! If you need a pro to just get it done for you, you can take advantage of my Showit Design Assistance service. If you get stuck, feel free to comment or email me directly and I will help you!
Pst – if you don’t have Showit yet, use my referral link and you will get a FREE MONTH of Showit!
